
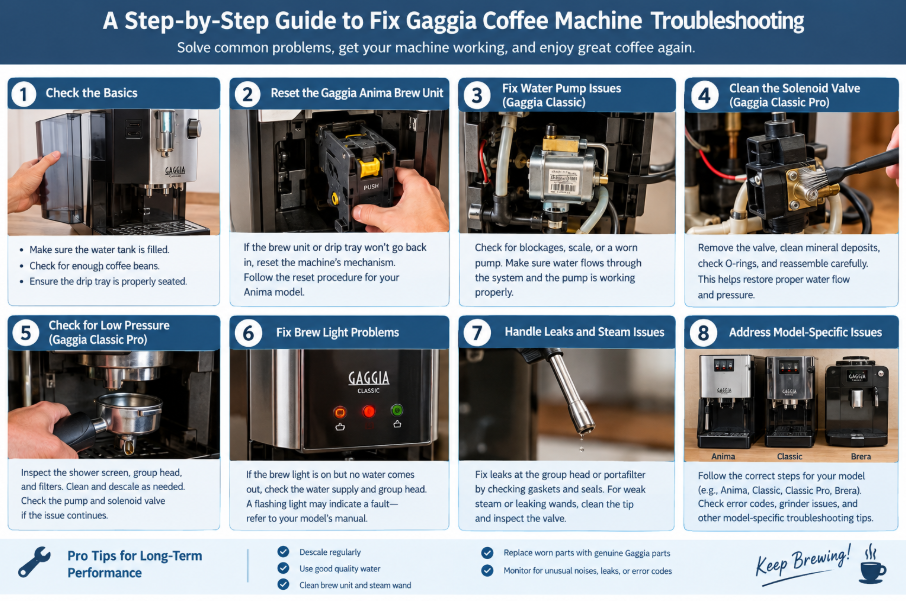
Step by step Solution for Gaggia Coffee Machine Error
Gaggia espresso machines are popular for their compact designs, dependable performance, and ability to make excellent coffee at home. However, even a well-maintained machine can develop problems over time. You might notice weak water flow, a brew unit that refuses to fit, a pump that makes unusual noises, or a machine that suddenly loses power.
The good news is that some problems have relatively straightforward solutions. Before replacing expensive components, it is worth checking for blockages, mineral scale, incorrect brew unit positioning, and other common causes, where you can learn the solution based on hands-on repair from experienced technicians.
This guide explains practical ways to fix Gaggia coffee machine troubleshooting issues, including problems with the Gaggia Anima, Classic, Classic Pro, and Brera.
Important safety note: Always unplug your machine and allow it to cool before opening the housing. Internal components can retain heat and contain hazardous electrical connections. Electrical repairs, thermal fuse replacement, and internal valve servicing should be performed only by someone with the appropriate skills. If you are unsure, contact a qualified espresso machine technician.
Quick Diagnosis: What Is Your Gaggia Telling You?
- No power at all: suspect the thermal fuse.
- Low or no flow from the group head: suspect the pump, or a clogged three-way solenoid valve.
- Drip tray or brew unit will not go in (Anima): the brew unit needs resetting.
1. How to Reset the Gaggia Anima Brew Unit
One common Gaggia Anima problem occurs when the brew unit or drip tray will not slide back into position. This can happen if a component is removed before the machine finishes its reset cycle. The internal gears may then be left in a position that prevents proper reinstallation.
Resetting a Stuck Drip Tray
- Remove the drip tray and check that nothing is obstructing its path.
- Locate the small switch behind the drip tray area, as demonstrated in the repair procedure for the relevant Anima model.
- Use an appropriate tool to activate the switch and allow the mechanism to move through its reset sequence. Keep your hands clear of moving parts.
- Allow the mechanism to finish moving before releasing the switch or attempting to reinstall the tray.
- Check whether the drip tray now slides into place without resistance.
Depending on the model, the mechanism may initiate a rinse cycle. Follow the manufacturer’s instructions for interrupting or completing that cycle. Do not force the tray into position.
Again, if you need to learn how to reset Gaggia Anima brew unit positioning, start by checking whether the machine has completed its normal operating cycle. If the brew unit cannot be reinstalled, the repair procedure may involve allowing the internal drive gears to return to their correct position.
- Switch off and unplug the machine before inspecting the removable components.
- Check the brew unit for coffee grounds or other obstructions.
- Confirm that the brew unit’s movable yellow positioning component is in the correct position, as specified in the model’s manual.
- Reinstall the brew unit only when the mechanism is aligned and the unit locks securely into place.
- Replace the drip tray, close the service door, and follow the manufacturer’s instructions to restart the machine.
Owners of the Anima, Anima Deluxe and Anima Prestige sometimes cannot slide the drip tray back in, or the brew unit refuses to lock into place. The usual cause is simple user error: something was removed before the machine had finished resetting. Knowing how to reset Gaggia Anima brew unit positions takes only a few minutes.
When the Brew Unit Will Not Lock In
A properly seated brew unit should need a push on its release to come out. If it slides in and out freely, the machine’s sensor is not registering it. Here is how to resolve the issue:
- Locate the small sensor slot and insert a thin piece of cardboard or a rolled-up banknote to trick the sensor. The brew unit symbol on the display should disappear.
- Close the service door. The machine rotates its internal gears so the unit can be reinserted.
- When the check mark appears, press the aroma strength button to cancel the rinse, then wait for the cup and bean icons to appear.
- Open the door, remove the cardboard, and make sure the yellow part is pushed up before sliding the brew unit back in.
If the machine still behaves oddly afterward, the same reset sequence is the first step to fix Gaggia Anima not dispensing coffee issues, since a mispositioned brew unit prevents a proper brew cycle. If you also have a grinder fault, the approach to fix Gaggia Brera not grinding is similar: check the brew unit position and clear any stuck grounds, then consult your manual before opening the grinder compartment.
2. Fix Gaggia Classic Water Pump Problems
A Gaggia Classic that produces weak espresso or struggles to deliver water may have a worn vibration pump. However, a pump problem is not the only possible explanation. Mineral buildup, a blocked shower screen, a clogged group head, or a restricted solenoid valve can produce similar symptoms.
The most common reason a Gaggia Classic stops producing full pressure is the water pump. This is a vibratory pump, and it is a normal wear part. Before replacing it, rule out simpler causes. A blocked group head or shower screen can mimic a failed pump, so run a proper descaling liquid through the machine first.
Test the Water Flow
Open the steam valve and press the brew (blue) switch. If water flows from the steam wand, the pump is working. If it does not, the pump is the likely culprit. If water flows from the steam wand but not the group head, look at the three-way valve or solenoid instead.
This test is the quickest way to solve Gaggia Classic pump runs but no water comes out situations. It is also the key diagnostic step when you need to fix Gaggia Classic Pro low pressure troubleshooting cases without guessing.
Diagnose the Problem Before Replacing Parts
To fix Gaggia Classic water pump problems, begin with simple checks rather than immediately opening the machine.
- Check the water tank: Make sure it contains enough water and is seated correctly.
- Inspect the group head: Coffee residue and mineral deposits can restrict water flow.
- Descale when appropriate: Use a compatible descaling product according to the manufacturer’s instructions.
- Compare water outlets: If water flows through the steam wand but not the group head, a blocked group head or solenoid valve may be responsible.
- Listen to the pump: Unusually loud operation combined with poor water delivery can indicate a problem, although noise alone does not prove that the pump has failed.
Gaggia Classic Pump Runs but No Water Comes Out
If your Gaggia Classic pump runs but no water comes out, check the tank, water supply path, and possible scale blockage first. A pump that vibrates without moving water may be struggling to draw water or may have developed an internal fault.
If water comes from the steam wand but not the group head, investigate the group head and three-way solenoid valve before assuming the pump is defective. If neither outlet delivers water, further diagnosis is needed to distinguish a blocked supply path from a pump failure.
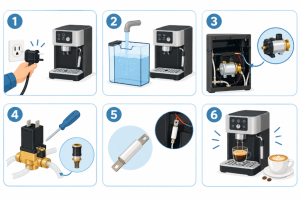
To fix Gaggia Classic water pump failures, replace the pump. It is one of the easiest repairs on the machine:
- Unplug the machine and remove the top panel.
- Dislodge the black rubber mounts from their slots, using a screwdriver gently, because the plastic can break.
- Pull the pump out with its hose and label the wires. The gray and white wires must go back on the same sides.
- Compare the new pump to the old one. Check the voltage (230/220 V in this example), frequency (50 Hz) and wattage (48 W). A brass top fitting is stronger than the plastic version.
- Transfer the lower fitting and the top fitting to the new pump, hand-tighten without overtightening the plastic, reconnect the wires and refit the rubber mounts.
- Refill the tank and test. A brand-new pump may sound odd for a few seconds because it has no water in it yet.
Pump trouble can also show up as noise. If you need to fix Gaggia espresso machine making loud vibrating noise, check that the pump’s rubber mounts are seated properly and the tank is not running low, then consider replacement if the pump rattles or struggles to deliver flow.
Fix Gaggia Espresso Machine Making Loud Vibrating Noise
Vibration pumps naturally produce some noise, so a certain amount of humming is normal. However, a sudden increase in noise accompanied by poor flow deserves attention.
- Confirm that the water tank is correctly installed and filled.
- Check for restrictions caused by scale or debris.
- Inspect external components for loose positioning, where safe and appropriate.
- Arrange professional pump testing if the machine continues to vibrate excessively or fails to deliver water.
Do not operate the machine with its housing removed to observe live electrical components unless you are a qualified technician working under appropriate safety procedures.
3. How to Clean the Solenoid Valve on Gaggia Classic Pro
The three-way solenoid valve helps direct water through the brewing system and relieves pressure after brewing. On a Gaggia Classic Pro with the appropriate manual steam control configuration, a clogged valve can cause little or no water to emerge from the group head.
Recognizing a Blocked Solenoid Valve
Symptoms include very low water flow from the group head, poor brewing performance, and a pump that appears to operate normally without delivering enough water to the coffee. Mineral deposits can accumulate inside the valve’s narrow passages, restricting water movement.
How to Clean Solenoid Valve on Gaggia Classic Pro
The full internal cleaning procedure involves removing the machine’s housing, accessing the boiler and valve, disconnecting electrical terminals, and carefully disassembling the valve. Because this exposes electrical and pressurized-system components, it is best suited to an experienced repairer.
Tools You Will Need
- Phillips screwdriver and a 4 mm Allen key
- 13, 14 and 17 mm open-ended wrenches
- A small pick, needle-nose pliers and a soft brush
- Descaler, food-safe grease (or Vaseline) and small cups for screws
A qualified technician should:
- Unplug the machine, remove the drip tray, water reservoir, steam knob and top panel, and detach the ground wires.
- Release the tube from the valve nipple, loosen the steam wand nut and lift out the wand.
- Turn the machine over, remove the four 4 mm bolts and lift the boiler out gently, noting the wire positions.
- Take the solenoid off. Beware of the two o-rings underneath, which can fall out.
- Disassemble the valve, keeping the plunger safe. The larger black rubber seat must face up on reassembly.
- Soak the metal body in full-strength descaler for about 30 minutes, brush it clean and blow compressed air through the two small passages. A gas station air pump works if you have no compressor.
- Reassemble, lightly grease the o-rings, and reconnect the wires: green and yellow ground at the bottom, gray at the front and orange at the back.
Use water with some mineral content but not too hard. Pure RO or distilled water can over-extract your coffee and cause other problems, while very hard water builds scale quickly. Regular descaling prevents a repeat.
Never immerse electrical components in descaler, mix cleaning chemicals, or use excessive force on plastic fittings. If you are inexperienced with internal espresso machine repairs, have a technician perform this work.
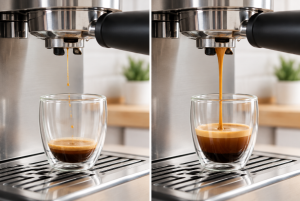
4. Fix Gaggia Classic Pro Low Pressure Troubleshooting
Low espresso pressure can result from several different faults. The important step is to identify whether the restriction occurs in the coffee puck, group head, water supply, or internal hydraulic system.
Common Causes of Low Pressure
- Blocked shower screen: Coffee oils and fine particles can obstruct water distribution.
- Mineral scale: Deposits may restrict internal water passages.
- Incorrect coffee preparation: Excessively fine grinding or an overly compacted puck can restrict brewing flow.
- Worn pump: A failing vibration pump may not deliver the required water flow.
- Solenoid valve blockage: A restricted valve can prevent normal group-head delivery.
For effective Gaggia Classic Pro low pressure troubleshooting, clean accessible brewing components first and descale when appropriate. Then compare the machine’s water delivery through the available outlets, following the owner’s manual. If the steam wand delivers water normally but the group head does not, the solenoid valve or group-head passages deserve particular attention.
5. Fix Gaggia Classic Pro Brew Light Problems
Solve Gaggia Classic Pro Brew Light On but No Water
If the brew light is on but no water comes out, the light alone does not confirm that the pump or heating system is functioning correctly. Begin with the water tank and accessible brewing components. Consider whether the problem affects both the steam wand and the group head.
If water flows through the steam wand but not the group head, a blockage in the group-head path or solenoid valve may be responsible. If neither outlet works, the pump or water supply path requires further diagnosis.
Fix Gaggia Classic Pro Brew Light Flashing
A flashing indicator may mean different things depending on the exact machine generation and operating state. Check the user manual for the specific light pattern before replacing components. Confirm that the machine has completed its startup or heating sequence and that no maintenance or fault indication is being overlooked.
If the light continues flashing unexpectedly, record the pattern and seek model-specific guidance. Do not assume that every flashing light indicates a failed pump or thermostat.
6. Gaggia Classic Thermal Fuse and Thermostat Problems
How to Replace Thermal Fuse on Gaggia Classic
A thermal fuse is a safety device designed to interrupt power if a specified temperature limit is exceeded. A failed fuse can leave a machine without power, but a dead machine can also have other electrical faults.
The repair transcript describes replacing a particular thermal fuse identified as DM 1040. That part number should not be assumed to fit every Gaggia Classic revision. Confirm the exact replacement specification for your machine before ordering anything.
A qualified technician should disconnect the machine, let the boiler cool, test the fuse with suitable equipment, and replace it with the correct temperature-rated component. The fuse must be secured in its designated position against the boiler and insulated as specified by the manufacturer. Wiring must be restored correctly, with suitable high-temperature connectors and protection.
Never bypass a thermal fuse. If the fuse has failed because the boiler overheated, the underlying cause must also be investigated.
On the other side, if your machine has lost power entirely, the thermal fuse on the boiler is the usual suspect. It cuts power when the boiler gets too hot, protecting you from overheating and pressure build-up.
Follow these steps to replace thermal fuse on Gaggia Classic machines or fix Gaggia Classic Pro turns off by itself, since a failing fuse can cut power unexpectedly.
- Unplug and cool the machine. Remove the two rear screws and slide off the top panel.
- Locate the fuse inside rubber tubing, held to the boiler by a small bracket with one screw.
- Move the front switch out of the way by pressing the spring clips with a flat-blade screwdriver, and photograph or label any wires you disconnect.
- Cut the zip ties, slide the tubing off and cut the old fuse out at the butt connectors.
- Strip the wires, crimp on the butt connectors supplied with the replacement (part number DM 1040 in the demonstration), and crimp in the new fuse.
- Slide the tubing back over the connections so nothing can short, then refit the bracket so the fuse sits in the groove on the boiler.
- Reattach the switch, zip ties and top panel.
The fuse must sit against the boiler under the bracket. If it hangs loose, it will not sense an overheating boiler. You can also test the old fuse for continuity with a meter: continuity means the fuse is good, and no continuity confirms it has failed.
Solve Gaggia Classic Pro Thermostat Not Working
A thermostat problem may cause heating difficulties, abnormal temperature control, or overheating. However, these symptoms can overlap with faults involving electrical connections, temperature sensors, heating elements, or safety devices.
If the machine repeatedly loses power, overheats, or fails to reach its normal operating temperature, unplug it and arrange a proper electrical diagnosis. Replacing the thermostat without confirming the fault can leave the original problem unresolved.
Fix Gaggia Classic Pro Turns Off by Itself
Unexpected shutdowns may be related to an electrical supply problem, a thermal safety device, an internal connection, or an overheating condition. Check the external power connection first. If the machine repeatedly switches off during heating or brewing, stop using it until the cause has been identified.
7. Fix Gaggia Steam Wand and Group Head Leaks
Why Is My Gaggia Espresso Machine Leaking from Group Head?
Water leaking around the group head may indicate a dirty or worn group gasket, a poorly seated portafilter, or a damaged sealing surface. First, remove coffee residue from the gasket area and check that the portafilter is inserted correctly.
If leakage continues, inspect the gasket and replace it if necessary using the correct part. Persistent leakage, especially when accompanied by unusual pressure or flow, warrants a more detailed inspection.
Fix Gaggia Classic Pro Portafilter Leaking
A leaking portafilter is often associated with a worn group gasket, coffee grounds trapped around the sealing surface, or incorrect portafilter positioning. Clean the rim and gasket area, check the basket and portafilter for damage, and avoid forcing the handle into position. Replace a damaged gasket with a compatible part.
Gaggia Classic Steam Wand Weak Pressure Fix
If steam pressure is weak, first confirm that the machine has reached its normal operating temperature and that the steam tip is not blocked by milk residue. Clean the removable tip according to the manufacturer’s instructions.
Persistent weak steam may be caused by scale buildup, heating problems, or a fault elsewhere in the steam system. Descale only as directed for your model, and seek service if the problem continues.
Gaggia Espresso Machine Steam Wand Leaking Fix
A steam wand that drips continuously when the steam control is closed may have a worn valve seal or a valve that is not closing completely. Clean accessible components and check the control’s operation. If the wand continues leaking, have the valve inspected and replace damaged seals as appropriate.
8. Gaggia Anima and Brera Brewing Problems
Fix Gaggia Anima Not Dispensing Coffee
If a Gaggia Anima fails to dispense coffee, check the water supply, bean supply, removable brew unit, and any displayed warning indicators. Ensure the brew unit is correctly installed and that the machine has completed its initialization sequence.
If the brew unit cannot be inserted or the drip tray will not fit, follow the reset guidance earlier in this article. If the machine accepts the brew unit but still fails to brew, additional diagnosis may be needed to identify a blockage or internal fault.
Gaggia Brera Error Code E05 Fix
When researching a Gaggia Brera error code E05 fix, confirm the exact error shown on your machine and consult the correct model manual. The supplied repair transcripts do not establish a verified diagnosis for E05, so it would be misleading to attribute this code to a particular failed component.
Record the warning, check the machine’s documented troubleshooting instructions, and avoid replacing parts based on an unverified error-code interpretation.
Fix Gaggia Brera Not Grinding
If the Brera grinder does not operate, check that the bean hopper contains beans and that the machine is not displaying a warning or preventing operation because of another fault. Unplug the machine before inspecting accessible areas for obstructions, and follow the manual’s grinder-cleaning instructions.
Do not insert tools into an operating grinder or disassemble the grinder while the machine is connected to power. If the motor remains silent, the grinder jams repeatedly, or an electrical fault is suspected, arrange professional service.
9. Prevent Future Gaggia Coffee Machine Errors
Regular maintenance can reduce the likelihood of poor flow, scale-related blockages, and premature component wear.
- Descale appropriately: Follow the machine’s maintenance schedule and use a compatible product.
- Use suitable water: Water that is too hard can promote mineral buildup. Follow Gaggia’s water recommendations rather than assuming distilled or reverse-osmosis water is appropriate.
- Clean brewing components: Remove coffee residue from accessible areas and maintain the brew unit as instructed.
- Maintain the steam wand: Clean the tip after steaming milk to prevent residue from accumulating.
- Respond to unusual symptoms early: Persistent leaks, reduced water flow, unusual noise, and unexpected shutdowns deserve attention.
- Use model-specific replacement parts: Check the machine’s exact model and revision before ordering pumps, fuses, gaskets, or valves.
Frequently Asked Questions
Why does my Gaggia Classic pump run but produce little water?
Possible causes include a restricted water supply, mineral scale, a blocked group head, a clogged solenoid valve, or a worn pump. Compare the available water outlets and eliminate accessible blockages before replacing parts.
Can descaling fix every Gaggia low-pressure problem?
No. Descaling may help remove mineral deposits, but it will not repair a worn pump, damaged seal, failed electrical component, or every mechanical blockage. Follow the manufacturer’s descaling instructions.
Why will my Gaggia Anima brew unit not go back in?
The internal drive mechanism may not have returned to its correct position, or the brew unit may not be aligned properly. Allow the machine to complete its normal cycle and consult the model-specific reset procedure rather than forcing the unit.
Should I replace the pump when my Gaggia makes a loud noise?
Not immediately. Some pump noise is normal, and increased vibration can have multiple causes. Check the water supply and possible restrictions first, then have the pump tested if the symptoms persist.
Is it safe to replace a Gaggia thermal fuse at home?
Thermal fuse replacement requires electrical repair skills and the correct part. Because incorrect installation can defeat an important safety function, use a qualified technician if you are not experienced with appliance electrical repairs.
What should I do if my Gaggia error code is not listed?
Write down the exact code and consult the manual for your specific model. Do not assume that a code has the same meaning across different Gaggia machines.
Why is there no water coming from my Gaggia group head?
Often it is a clogged three-way solenoid valve caused by scale. If the steam wand delivers water but the group head does not, clean the solenoid. If neither delivers water, the pump is the likely culprit.
How do I know if my Gaggia pump is failing?
Run water through the steam wand. Weak or no flow, even though you can hear the pump working, points to a worn vibratory pump.
Is it safe to repair a Gaggia myself?
Many repairs are manageable at home if you unplug the machine, let it cool and work carefully. Never run the machine with the cover off unless a test demands it, and then do not touch any internal parts. If you are unsure, use a qualified repair technician.
How often should I descale my Gaggia?
It depends on your water hardness and usage. Descale regularly, and sooner if you live in a hard-water area, because scale is behind many solenoid and flow problems.
What water should I use in my Gaggia?
Use filtered water with moderate mineral content. Avoid distilled or pure RO water, and avoid very hard water.
Conclusion: Get Your Gaggia Back to Brewing
Effective Gaggia troubleshooting starts with identifying the symptom rather than replacing parts at random. A stuck Anima brew unit may need correct repositioning, a Classic with poor water flow may have a restriction or worn pump, and a Classic Pro with a clogged three-way solenoid valve may need careful cleaning.
Start with accessible checks, routine cleaning, and model-specific maintenance instructions. Treat internal electrical work, thermal fuse replacement, and boiler or solenoid disassembly with appropriate caution. If the problem persists or involves overheating, electrical faults, or unexplained leaks, professional diagnosis is the safer option.
Key Takeaways
-
- Check water supply and accessible blockages before replacing the pump.
- Reset and correctly align the Anima brew unit instead of forcing it into place.
- Consider solenoid valve blockage when water reaches the steam wand but not the group head.
- Use the correct thermal fuse and never bypass a safety device.
- Keep your machine clean, descale according to its manual, and use suitable water.
- Confirm error codes and replacement parts against the exact model before attempting repairs.
- Test flow through the steam wand to separate pump problems from solenoid problems.
- Replace the vibratory pump if flow is weak even though the pump runs.
- Clean a clogged three-way solenoid with descaler, a brush and compressed air.
- A dead machine often means a failed thermal fuse, and it must sit against the boiler under its bracket.
- On the Anima, reset the brew unit with the sensor switch or the cardboard trick.
- Always unplug and cool the machine before repairs, and use good water.
Most Gaggia faults trace back to a few causes: a worn pump, a scaled solenoid valve, a blown thermal fuse or a brew unit that needs resetting. Diagnose first, repair second, and keep up regular descaling to prevent repeat problems.
