
Fix Ninja Coffee Maker: Some Common Problems & Solutions
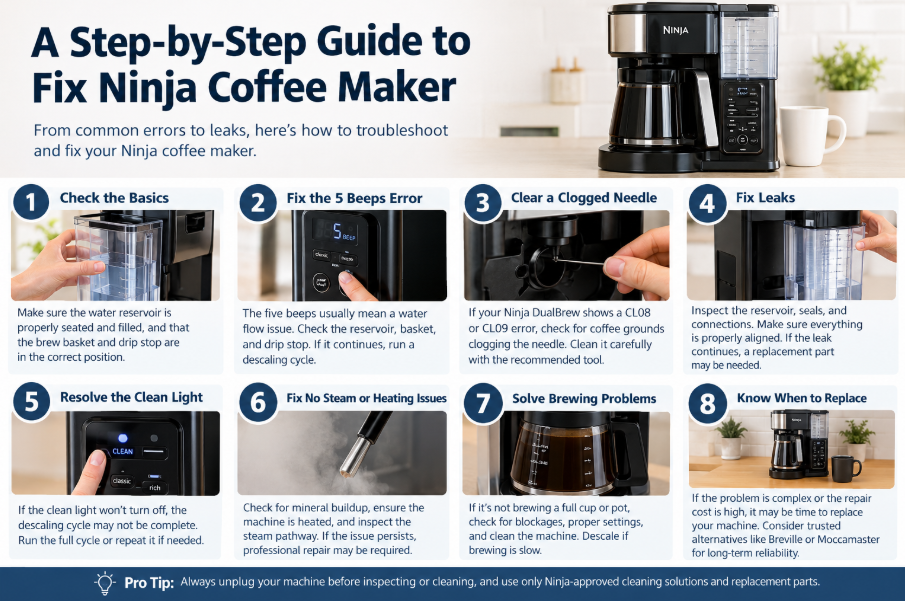
For Ninja coffee maker lovers, they face the common errors such as five beeps, a flashing clean light, or a puddle of water on the counter which cause a machine simply refuses to pump water.
Many common problems come down to a clogged component, mineral buildup, a misplaced reservoir, or a brewing setting that needs attention.
In this guide, we’ll explain how to fix Ninja coffee maker problems using practical troubleshooting steps inspired by real repair experiences.
Through this guide, you will also learn how to fix the machine showing five beeps, water leaks, clogged needles, slow brewing, and a clean light that won’t turn off.
Safety first: always unplug the machine and let it cool before inspecting anything. Opening the casing can void your warranty, so try the simple fixes before you reach for a screwdriver
1. How to Fix Ninja Coffee Maker 5 Beeps
The infamous five beeps can be frustrating. You press the brew button expecting coffee, but the machine shows five continuous beeps when you press brew.
Usually, the cause is associated with restricted water flow, an improperly seated reservoir, a misaligned brew basket that sits slightly off, or mineral deposits inside the machine choking the internal tubing and confusing the heating element.
Step-by-Step Troubleshooting
Here is how to fix a Ninja coffee maker with 5 beeps, from easiest to hardest:
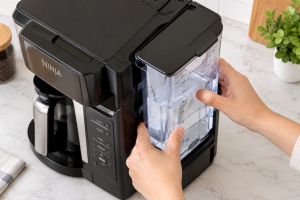
- Check the water reservoir. Remove the tank, inspect its seating area, and reinstall it firmly. Make sure it contains enough water and sits correctly in its housing.
- Inspect the brew basket. Ensure the basket and other removable brewing components are correctly positioned.
- Check the drip stop. Make sure the drip-stop lever is open when brewing into a carafe. A closed lever can prevent coffee from flowing into the pot.
- Run a descaling cycle. Mineral deposits can restrict water movement through internal tubing and heating components. Follow the instructions for your specific model.
These checks are a sensible starting point when learning how to fix Ninja coffee maker 5 beeps. If the machine continues beeping without dispensing water, the problem may involve an internal blockage, pump, sensor, or heating component.
The main cause is the calcium deposits around the heater. The steps were to disassemble the removable parts, then turn the unit over above a sink because fluid will drip out. Next, remove the base screws to expose the heater area, undo the hose, and take out the two Phillips screws. Lift the section away, and the heater sits just below. Clear out all the built-up gunk, reassemble everything, and the beeping should stop.
However, opening the machine to clean the heater is not a suitable first step for most owners. Unplugging the appliance does not eliminate every electrical or burn risk. Internal repairs should be left to someone qualified to perform them safely.
2. How to Fix the Ninja Coffee Maker Clean Light That Won’t Turn Off
You have completed a cleaning cycle, rinsed the machine, and expected the warning light to disappear. Instead, it remains illuminated. If your Ninja coffee maker clean light won’t turn off, the descaling cycle may not have completed correctly, or mineral deposits may still be present.
What to Do
- Check the manufacturer’s cleaning instructions for your exact model.
- Confirm that the full descaling cycle, including any required rinsing, was completed.
- If the light remains on, repeat the prescribed process when the manual recommends it.
- Use a compatible Ninja coffee maker descaling solution according to the product instructions.
Some owners report needing more than one cycle before the light clears. However, repeating cycles indefinitely is not the answer. Avoid increasing the descaler concentration beyond the manufacturer’s instructions, and never mix cleaning chemicals.
If you wonder how to fix Ninja coffee maker clean light wont turn off, remember that the indicator may behave differently across model families. If the light persists after the correct procedure, consult the manual or customer support before assuming the machine is defective.
The main cause usually comes from the cycle that is not completed start to finish, or leftover residue that is survived in a single vinegar run
Alternatively, you can run the descaling cycle again without interrupting it. Some owners need two or even three cycles before the light finally resets.
3. How to Fix Ninja Coffee Maker Leaks
Water underneath the machine, drips around the reservoir, or moisture near the brewing area can have several causes. The key is identifying where the water originates before replacing parts.
To fix a ninja coffee machine leak, start with the basics. Place the unit on a perfectly level surface, reseat the tank fully, and inspect the gasket for wear.
Fix a Leaking Ninja Coffee Maker Water Reservoir
- Remove the reservoir and inspect it for visible cracks or damage.
- Check that the tank is correctly seated and aligned with its connection.
- Inspect accessible seals for visible wear, debris, or displacement.
- Place the machine on a stable, level, waterproof surface.
- After reassembling removable components, check for leakage during a supervised water-only cycle if the manual permits it.
Those checks above are a practical starting point
And, if you want to fix leaking Ninja coffee maker water reservoir problems, check whether the reservoir gasket has worn down. A worn gasket lets water escape at the connection. Replace it, and make sure the tank clicks firmly into place so water cannot run down the back or base.
Ninja Coffee Machine No Water Repair
A ninja coffee machine no water repair usually means clearing the scale-blocked valve described above. Always descale twice after reassembly to flush remaining particles.
How to Fix Ninja Luxe Premier Leaking During Brewing
If you need to fix Ninja Luxe Premier leaking during brewing, first distinguish between water escaping around the reservoir and coffee or water leaking near the brew head.
Check that removable brewing components are installed correctly, inspect accessible seals, and avoid overfilling the grounds basket.
For espresso-style models, a poorly seated filter component, excessive coffee grounds, or a blocked brewing path may contribute to leakage. If water continues escaping from the machine’s housing, stop using it and seek professional assistance.
Alternatively, in order to fix Ninja Luxe Premier leaking during brewing, follow these steps:
- Check the water tank connection. Make sure it is seated and clicked into place.
- Inspect the portafilter seal. Lock it in firmly, and check the rubber gasket in the brew head for wear or coffee buildup.
- Clean the basket and group head. Backed-up grounds force pressure out through weak points.
- Don’t overfill or over-tamp. Excess pressure causes leaks.
- Run a water-only test brew. If it still leaks with an empty portafilter, suspect internal seals or valves.
Ninja Coffee Maker Leaking From Bottom Fix
A Ninja coffee maker leaking from bottom fix begins with determining whether water is escaping from the removable reservoir, an external connection, or an internal hose or valve. Water underneath the appliance does not automatically mean the reservoir is faulty.
Unplug the machine before inspecting removable parts. Do not continue operating an appliance that leaks from its base, particularly if water could reach electrical components. Internal hose, valve, or gasket repairs may require professional service.
In this situation, a leak near the front edge of a particular machine is usually related to the way steam and moisture escaped around a panel. This is an individual repair observation, not proof that every Ninja model has the same design defect. Avoid covering ventilation openings or applying ordinary adhesive tape near hot components.
Anyway, you can try to seal that edge with three layers of 3M tape. Because of this, any steam that still builds up simply evaporates. You can also place rubber anti-slip pads under the unit to reduce vibration
4. How to Fix Ninja Coffee Maker Not Brewing a Full Cup or Pot
When your selected brew size doesn’t match the amount in your cup or carafe, the cause may be restricted water flow, an incorrect setting, a partially blocked needle, or a component that isn’t positioned properly.
Troubleshooting Steps
- Confirm that the selected brew size and brewing mode are correct.
- Make sure the reservoir contains enough water for the selected amount.
- Check that the basket, carafe, and removable adapters are installed correctly.
- Inspect accessible areas for coffee grounds or other obstructions.
- Descale the machine according to its manual if mineral buildup is suspected.
If you want the solution how to fix Ninja coffee maker not brewing full cup issues, start with these basic checks. They also provide a useful starting point for a Ninja coffee maker not brewing full pot fix.
Moreover, the unevenly settled coffee grounds and possible flow-sensing problems may contribute to inconsistent brewing. If the machine repeatedly dispenses the wrong amount despite correct setup and cleaning, the issue may require a technician.
Alternatively, in order to fix a ninja coffee maker not brewing full cup, level the grounds in the basket, use a consistent grind, and descale the machine. For the related ninja coffee maker not brewing full pot fix, also check that the drip stop lever moves freely.
Quick Checklist
- Level the coffee grounds evenly.
- Avoid a grind that is too fine.
- Descale regularly.
- Check the drip stop for debris.
Drip Stop Lever and Valve Parts
If the machine stops mid-brew and you have to keep pressing the button, worn parts may be to blame. A ninja coffee maker drip stop lever replacement can restore normal flow when the lever sticks. A ninja coffee maker valve spring repair kit is useful when the valve no longer closes and opens properly. Some owners report that no cleaning method helped, so replacement parts or a different appliance may be the final answer.
5. How to Fix Ninja DualBrew Needle Clog
A clogged needle can prevent water from passing through a single-serve brewing system. Ninja coffee maker with a CL08/CL09 error, a squeaking noise, and a machine that would not pump water, inspection is needed to reveal coffee grounds packed into the accessible needle openings.
Safe Needle-Cleaning Steps
- Turn off and unplug the coffee maker, then allow it to cool completely.
- Remove the compatible single-serve adapter and other removable components as directed in the manual.
- Inspect the accessible needle area for compacted grounds.
- Use the model-approved cleaning tool to clear the obstruction carefully.
- Reassemble the components and perform the recommended cleaning or water-only cycle.
To solve this, you can use a water flosser to loosen grounds, followed by a successful test using the carafe adapter. This is an individual repair account, not a universal recommendation. Pressurized water can damage components or force debris farther inside, so use only a cleaning method approved for your model.
If you want to know how to fix Ninja DualBrew needle clog problems, avoid dismantling a needle assembly that isn’t designed for user removal. Stop if the needle is damaged, the pump continues making unusual noises, or the error returns.
6. How to Fix Ninja Coffee Maker No Steam
A Ninja espresso machine that produces no steam may have a blocked steam pathway, mineral buildup, or a problem with its valve or heating system.
Start With These Checks
- Verify that the machine has completed its heating process.
- Check the water reservoir and confirm that it is properly installed.
- Inspect the accessible steam wand or outlet according to the manual.
- Run the recommended descaling procedure if mineral deposits are suspected.
If you find scale obstructing a three-way valve responsible for hot-water and steam pathways in a Ninja Luxe Cafe ES601, cleaning the affected valve will restore flow in that particular case.
This explains why descaling may not always resolve severe blockages. However, valve removal involves internal plumbing, clips, seals, and tools. If you need to fix Ninja coffee maker no steam and routine maintenance doesn’t work, professional repair is safer than opening the appliance without the necessary experience.
Alternatively, the repair involves removing the top case or a Torx T10 is needed for the rear screws), disconnecting the water pipe, and releasing the locking clips on the three-way valve. Unscrew the valve, then clean and descale it. The plunger should move freely, so lightly grease the O-ring before refitting. Tighten only until the metal plunger stops, since it threads into plastic
7. Heating Element, Pump, and Error-Code Problems
Some Ninja coffee maker failures are more complicated than a misplaced reservoir or clogged basket. A machine that repeatedly stops, fails to heat, or displays an error may have a problem involving the pump, temperature sensor, internal valve, wiring, or heating system.
Fix Ninja Coffee Bar Heating Element Not Working
If you suspect a heating problem, check the power supply and follow the troubleshooting instructions for your model. If the machine powers on but doesn’t heat water, or it repeatedly stops during brewing, contact customer support or a qualified appliance technician.
The solution of how to fix Ninja coffee bar heating element not working may lead you to instructions for opening the base and cleaning calcium deposits. Sometimes, internal electrical and heating components present burn and shock risks. Don’t attempt this repair unless you have the appropriate technical qualifications.
Alternatively, to fix a ninja coffee bar heating element not working, suspect calcium buildup first. A heater coated in scale cannot transfer heat properly. Cleaning it, as in the five-beeps repair, often brings it back to life
Fix Ninja Coffee Maker CL08, CL09 Error Not Brew
For a CL08 or CL09 error accompanied by no water flow, check the reservoir, removable adapters, and accessible needle area first. The packed coffee grounds that were associated with the error and normal brewing returned after the blockage was cleared.
Because error meanings can vary by product and market, verify the exact code in your model’s manual rather than assuming every CL08/CL09 message has the same cause.
The machine squeaked while trying to pump water. The culprit was the needle, which was jammed with coffee grounds. The casing could not be opened to reach it from the top, so the blasted water was from a water flosser into the openings on each side of the needle. The grounds loosened, and flow returned when using the carafe adapter.
Ninja Coffee Maker Error Code E1
If your machine displays a Ninja coffee maker error code E1, consult the official troubleshooting information for your specific model. Do not assume E1 has the same meaning across every Ninja coffee maker. Record when the error appears and whether the machine pumps, heats, or dispenses water before contacting support.
In general, scale, a blocked needle, or a poorly seated reservoir are sensible first checks.
Ninja Dual Brew Pro Not Working
If your Ninja Dual Brew Pro is not working, begin with the power supply, reservoir position, removable adapters, and accessible brewing components. If basic troubleshooting and the recommended cleaning cycle do not help, avoid repeated attempts to force the machine through a brew cycle. Persistent pump noises, electrical smells, or leakage are reasons to stop using it.
Ninja Hot and Iced Coffee Maker Repair
For Ninja hot and iced coffee maker repair, confirm that the correct brew style and serving size are selected. Then check the water supply, basket position, and maintenance indicators.
If the machine cannot complete a cycle or produces an error, use the model-specific diagnostic instructions rather than applying repair steps intended for a different product.
For ninja hot and iced coffee maker repair, the same fundamentals apply: descale, clean the needle and basket, check the seals, and confirm the drip stop lever moves freely
8. Descaling Problems and Replacement Parts
Descaling removes mineral deposits that can restrict water flow and affect brewing performance. But using the wrong cleaner, an incorrect concentration, or an unsuitable cleaning method can create additional problems.
Ninja Coffee Maker Brewing Slow After Descaling
If your Ninja coffee maker is brewing slowly after descaling, check whether the prescribed rinse cycle has been completed. Inspect accessible removable parts for loosened debris, and confirm that the reservoir and basket are installed properly.
If slow brewing continues, avoid repeatedly running concentrated descaler through the machine. Persistent restrictions may involve an internal valve, pump, or water pathway that requires service.
On the other side, this is usually loosened scale flakes travelling through the lines and partially blocking a valve or needle. Run several plain-water brew cycles to flush the system, and if it persists, inspect the needle and valves described below.
Perhaps, the cause is caused by you select a large cup and get something suspiciously small. The inconsistency makes smart brewing feel hollow. Reviewers point to grounds settling unevenly in the basket or a flow sensor that becomes confused over time
Choosing Replacement Parts
Some repairs require replacement components rather than cleaning. If the drip stop is damaged, search for a compatible Ninja coffee maker drip stop lever replacement using the exact model number.
Likewise, a Ninja coffee maker valve spring repair kit should only be considered if the manufacturer or a qualified repair professional confirms that the component is replaceable and the kit fits your machine. Parts designed for another Ninja model may not fit or function correctly.
9. When Should You Replace Your Ninja Coffee Maker?
Not every malfunction means your machine needs replacing. Cleaning a removable component or correcting a loose reservoir can be inexpensive. Internal valve, pump, or heating repairs are a different story.
Before deciding, compare the repair estimate, part availability, warranty coverage, and age of the appliance. If you keep hitting the same fault, two alternatives often get praised for durability. Breville Precision Brewer and Technivorm Moccamaster can be alternatives worth comparing if durability and brewing consistency are priorities.
The Breville Precision Brewer is presented as a feature-rich option with PID temperature control and specialty-coffee brewing credentials, SCA certified.
The Technivorm Moccamaster is highlighted for its simpler approach and reputation for longevity.
Neither is guaranteed to be trouble-free, so compare current specifications, warranty terms, and independent reviews before purchasing.
Frequently Asked Questions
Why does my Ninja coffee maker beep five times but not brew?
Possible causes include an improperly seated reservoir, a misaligned brew basket, a closed drip stop, or restricted water flow. Check the accessible components and follow the recommended descaling procedure.
It usually signals a water-flow problem: an unseated reservoir, a misaligned basket, a closed drip stop lever, or scale in the tubing or heater
Can I use vinegar instead of Ninja descaling solution?
Only if your model’s instructions permit it. Use a compatible descaler and the prescribed concentration and rinse procedure. Don’t mix vinegar with commercial cleaning products.
Why is my Ninja coffee maker leaking from the bottom?
Water may be escaping from the reservoir connection, a damaged seal, or an internal hose or valve. Stop using the appliance if the leak could reach electrical components.
Common causes are a worn reservoir gasket, an uneven surface, a loose tank, or steam escaping through gaps in the top section.
Can I repair a clogged needle myself?
You can usually inspect and clean accessible components using the tool and procedure approved for your model. Avoid dismantling sealed assemblies or using pressurized cleaning equipment unless explicitly recommended.
Should I open my Ninja coffee maker to clean the heater?
Generally, no. Internal repairs can expose you to electrical and burn hazards and may affect warranty coverage. Use routine maintenance first and seek qualified assistance for persistent heating or water-flow problems.
How often should I descale?
Descale whenever the clean light comes on, and more often if you have hard water. Regular descaling prevents most valve, heater, and needle failures.
Can I repair my Ninja myself?
Many fixes, such as reseating parts, descaling, and flushing a needle, need no tools. Opening the casing can void the warranty, so weigh that first.
Is it worth repairing or should I replace it?
If the fix is cheap, such as a gasket, a spring kit, or descaling, repair it. If the same fault keeps returning, consider replacing the machine.
Conclusion: Fix the Simple Problems First
Most Ninja failures trace back to three things: mineral scale, clogged parts, and worn seals. Start with the easy checks, descale thoroughly, and only open the machine when simpler steps fail. With patience, you can fix a Ninja coffee maker and get back to a reliable morning cup.
Learning how to fix Ninja coffee maker problems starts with identifying the symptom rather than replacing parts at random. Check the reservoir, basket, drip stop, accessible needle, and maintenance indicators before moving on to more complicated possibilities.
Key takeaways:
-
- Five beeps usually mean a water-flow or scale problem. Check seating, then descale or clean the heater.
- A persistent clean light may mean the descaling cycle wasn’t completed or mineral deposits remain.
- Leaks require identifying their source before choosing a replacement part.
- Slow brewing and needle blockages may be related to restricted water flow.
- Persistent steam, heating, pump, or internal valve problems may require professional repair.
- A stubborn clean light often needs two or three full descaling cycles.
- Scale-blocked valves cause no steam and no water. Remove, clean, and descale them.
- Flush a jammed needle with a water flosser instead of forcing the unit apart.
- Level surfaces, fresh gaskets, and tape or pads can stop leaks.
- If failures keep returning, a more durable alternative may be worth the cost.
Ninja coffee makers offer convenient brewing options, but each appliance has maintenance issues. With careful troubleshooting and model-specific instructions, you can often identify the cause, avoid unnecessary replacements, and how to fix them on your own.
