
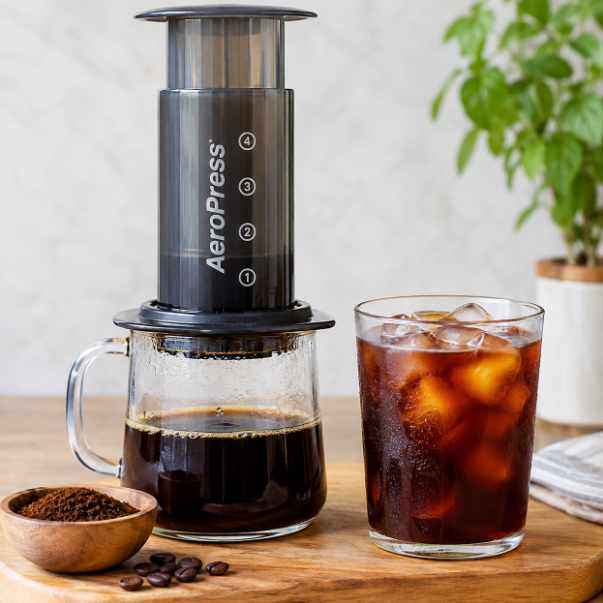
AeroPress Juicy Cold Brew Coffee: Recipes, Ratios & Tips
If you think an AeroPress is only useful for making a quick hot coffee, it is time to look at it differently.
Whether you want a single coffee cold brew glass in three minutes or a small batch of concentrate that lasts the week, these compact brewer: AeroPress and AeroPress XL will handle both. This guide shows you how to get a smooth, sweet, low-bitterness cup, using methods and principles from experienced AeroPress brewers
The idea behind aeropress juicy cold brew coffee is simple: use the AeroPress to make a small, concentrated batch that can be diluted with water, milk, or served over ice from an overnight concentrate to a surprisingly fast AeroPress XL recipe.
Why Make Cold Brew With an AeroPress?
While traditional cold brew systems require massive brewing chambers, counter space, and hours of passive waiting, the AeroPress and AeroPress XL offer a rapid, highly customizable method.
Whether you are looking for a smooth concentrate to mix into morning iced coffee, a robust base for a steaming hot mug, or a rapid 3-minute brew, you can use the aeropress xl cold brew as a quick method
Besides, a traditional cold brew setup is designed to produce a larger quantity of coffee. That is useful when you want several servings, but it can be unnecessary when you only need enough for yourself or one cup only.
The AeroPress offers a convenient alternative because it is compact and easy to clean. Making cold brew with Aeropress can be smoother, less bitter, and less acidic than many hot-brewed coffees. It can also be used as a concentrate for either iced or hot coffee.
Another important distinction is that cold brew is not simply iced coffee.
Iced coffee is generally brewed hot and then cooled or poured over ice, whereas cold brew relies on a longer extraction with cool or room-temperature water.
How to Make Juicy Cold Brew Coffee With AeroPress
There are several ways to approach an AeroPress cold brew. The overnight method is the most straightforward if you have time, while the AeroPress XL method uses extended stirring to dramatically shorten the brewing process.
If you want to know how to make juicy cold brew coffee with aeropress, the secret is avoiding harshness. Four ideas from veteran AeroPress brewing apply well here: a shorter ratio, a coarser grind, a lower temperature, and a slower press. The temperature tip is built into cold brew by default, and the other three still matter.
Classic AeroPress Cold Brew Concentrate
The process uses approximately 35–40 grams of ground coffee with 150 ml of water, creating a very concentrated mixture. The grounds are placed in the AeroPress and combined with room-temperature water before steeping.
Ingredients
- 35–40 g ground coffee
- 150 ml room-temperature water
- AeroPress with paper filter
- Ice, milk, half-and-half, or additional water for serving
Step-by-Step Method
- Add the ground coffee to the AeroPress.
- Pour in approximately 150 ml of room-temperature water.
- Stir thoroughly so the coffee grounds are evenly saturated.
- Cover and let the coffee steep for at least 12 hours.
- For a stronger brew, the transcript suggests extending the steep to approximately 24 hours.
- Press the coffee gently through the paper filter.
- Transfer the concentrate to a container and refrigerate if desired.
The resulting concentrate can be diluted according to taste. For iced coffee, an equal portion of milk, half-and-half, or water can be added before serving over ice. For hot coffee, dilute the concentrate with an equal portion of hot water.
AeroPress Cold Brew Concentrate Ratio
The aeropress cold brew concentrate ratio here is 1:2 by volume, such as one cup of coffee to two cups of water. Because coffee grounds are much lighter than water, this is closer to 1:4 by weight.
If you have no scale, a measuring cup is the easiest way to be consistent. The recipe makes about 100 ml of concentrate.
A concentrated brew lets you decide how strong the final drink should be. You can add water for a cleaner black coffee, milk for a softer drink, or ice for an iced version.
AeroPress Cold Brew Concentrate Recipe
For the basic aeropress cold brew concentrate recipe, start with roughly 35–40 grams of coffee and 150 ml of water. The transcript also gives a volume-based approach of approximately one part coffee to two parts water.
If you do not have a scale, the source recommends measuring by volume. However, weighing coffee gives you greater consistency from one batch to another.
This aeropress cold brew concentrate recipe is built for one person:
- Add 5 tablespoons (35 to 40 g) of ground coffee to the AeroPress.
- Add 10 tablespoons (150 ml) of water.
- Stir to combine, then cover and cap it.
- Steep at room temperature for at least 12 hours and up to a day, depending on how strong you want it.
- Press through a paper filter into a pitcher.
- Refrigerate for up to 5 to 7 days.
How to Serve Your Concentrate
- Iced: Dilute with an equal part of water, milk, or half and half, sweeten with simple syrup if you like, and add ice.
- Hot: Dilute with an equal part of hot water, and warm your mug first.
Best Coffee Grind Size for AeroPress Cold Brew
The best coffee grind size for aeropress cold brew depends on your method.
For the overnight concentrate, use a grind between espresso and drip.
For the fast, stirred XL recipe, a medium grind like drip works well.
Many brewers find that coarser grounds taste cleaner, because you should focus on taste rather than chasing an extraction number
For the best coffee grind size for aeropress cold brew, avoid automatically assuming that finer is always better. The process specifically favors coarser grounds and emphasizes taste rather than chasing a particular extraction number.
For an AeroPress XL recipe, you can use a medium grind comparable to drip coffee.
What Is the Best Grinder for AeroPress Cold Brew?
The best grinder for aeropress cold brew is one that gives you a consistent, adjustable grind. A burr grinder is the best choice because it produces even particles, which means fewer bitter or sour notes. Blade grinders produce uneven grounds that make cold brew muddy.
Anyway, there is no a specific grinder model as the best grinder for aeropress cold brew.
Therefore, consistency is more important than choosing a particular brand. A grinder capable of producing a repeatable medium or medium-coarse grind gives you a useful starting point for experimenting with cold brew.
Make sure to grind the beans immediately before brewing for better flavor.
Best Coffee Beans for AeroPress Cold Brew
At this point, you can use medium or dark roast because lighter coffee can produce weaker results in the concentrated recipe.
For AeroPress XL recipe, you can use a lighter side of medium roast and describes the resulting coffee as enjoyable.
Make sure to choose fresh beans, and grind just before you brew.
The best coffee beans for aeropress cold brew are medium to dark roasts if you’re making the overnight concentrate, since lighter roasts produce a weaker cup with a long steep.
Here, the best coffee beans for aeropress cold brew is ultimately based on the recipe and your preferred flavor profile. A medium roast is a useful starting point if you want to balance strength and flavor.
AeroPress XL Cold Brew in About 3 Minutes
The fastest method to make cold brew coffee is with the aeropress xl. It works without hot water, but only if you stir steadily. The stirring does the work that heat normally would.
What You’ll Need
- 60 g of coffee (any kind works; a lighter-medium roast is a good choice)
- 300 g (300 ml) of room-temperature water
- AeroPress XL and a paper filter
- A stirrer and a timer with approximately 90 seconds of continuous stirring
AeroPress Cold Brew Recipe Inverted
This aeropress cold brew recipe inverted keeps the water from dripping through while you stir.
- Grind the coffee to a medium consistency, about what you would use for drip.
- Place the Aeropress XL in the inverted position and add the coffee.
- Add 300 g of room-temperature water.
- Stir steadily for 1 minute and 30 seconds. This is the crucial step.
- Pre-rinse a paper filter, place it in the cap, and press it gently to remove excess air.
- Attach the cap, flip the Aeropress XL, and press for about 30 seconds.
You get roughly 9 oz of fairly strong cold brew with a good taste at room temperature, but it’s excellent over ice, and you can dilute it to taste.
One caution from the original brewer: using more than 60 g in the Aeropress XL without a much longer steep didn’t taste as good.
You can start with the Aeropress XL in the inverted configuration with 60 grams of medium-ground coffee, followed by 300 grams of room-temperature water then stir steadily for approximately 1 minute and 30 seconds.
Prepare a natural paper filter by rinsing it and placing it into the cap. The filter is then gently pressed into position before the AeroPress is inverted and pressed for roughly 30 seconds.
The recipe produces approximately 9 ounces of fairly strong cold brew. It can be diluted to taste or served directly over ice.
How Long to Steep AeroPress Cold Brew?
People often ask how long to steep aeropress cold brew. It depends on your method.
Agitated brews like the XL recipe are done in about 90 seconds of stirring plus a 30-second press, while hands-off concentrate needs 12 to 24 hours. Longer steeping gives a stronger, heavier cup. Start at 12 hours and taste before going longer
- Overnight method: At least 12 hours.
- Longer concentrate: Up to approximately 24 hours.
- AeroPress XL rapid method: About 90 seconds of vigorous stirring followed by pressing.
The longer method relies on time to extract flavor from room-temperature coffee grounds, while the Aeropress XL method uses continuous agitation to accelerate the process.
AeroPress Overnight Cold Brew Method
If you prefer a hands-off approach, the aeropress overnight cold brew method makes a concentrate you can store and use all week.
The aeropress overnight cold brew method is particularly convenient because most of the work happens while you sleep.
Prepare the coffee in the evening, let it steep overnight, and press it the following morning.
This approach also gives you considerable control over the final beverage. Keep the concentrate strong if you want to dilute it later, or adjust the serving ratio until you find a balance that works for your beans.
Can You Make Cold Brew With AeroPress Go?
Yes. If you’re wondering can you make cold brew with aeropress go, the same principles apply.
The Aeropress Go has a smaller chamber, so scale your dose and water down proportionally and keep the stir time and gentle press the same. Treat this as a starting point and adjust to taste.
Anyway, the standard AeroPress concept can also be used to create cold brew concentrate.
Because capacity differs between AeroPress models, the safest approach is to adapt the coffee and water quantities to the capacity of your brewer rather than automatically copying the AeroPress XL measurements.
AeroPress Cold Brew vs Hot Brew Acidity
The source describes cold brew as smoother, less bitter, and less acidic than the coffee preparation discussed in the video.
However, acidity and perceived acidity are influenced by coffee variety, roast, grind, brewing conditions, concentration, and serving temperature. For that reason, your experience may differ from another brewer’s.
AeroPress Iced Coffee vs Cold Brew
AeroPress iced coffee vs cold brew is an important distinction. Cold brew is extracted using cool or room-temperature water over an extended period, while iced coffee can be brewed hot and then cooled with ice.
The AeroPress can be used for either style. The cold brew approach is especially useful when you want a concentrate that can later become either an iced or hot beverage.
AeroPress vs French Press Cold Brew
In an aeropress vs french press cold brew comparison, the key difference is the filtration and brewing format. The AeroPress combines immersion with pressure filtration, allowing you to separate the brewed coffee from the grounds relatively quickly.
The transcript does not provide a controlled taste comparison between the two brewers, so there is no source-supported basis for declaring one universally better.
AeroPress vs Cold Brew Maker
The aeropress vs cold brew maker decision largely comes down to quantity and convenience. A dedicated cold brew maker can be useful when preparing larger batches, whereas the AeroPress is well suited to smaller quantities.
If you typically make coffee for one person, the AeroPress’s compact design makes it a practical option. If you regularly prepare several servings at once, a larger cold brew system may be more appropriate.
Filters and Flow Control Options
Stainless Steel Filter for AeroPress Cold Brew
A stainless steel filter for aeropress cold brew lets more oils through, giving a heavier body, though a little fine sediment is normal. Paper gives a cleaner, brighter cup. Try both and keep the one you like.
Related to this, a stainless steel filter for aeropress cold brew can be considered if you prefer a reusable filter instead of disposable paper. However, the provided transcript specifically demonstrates paper filtration, including a natural paper filter for the AeroPress XL recipe.
Changing the filtration system can alter the amount of fine material that reaches the cup, so it is worth treating the filter as another variable when dialing in your recipe.
Fellow Prismo AeroPress Cold Brew Recipe
The Fellow Prismo is a popular pressure-actuated attachment for the AeroPress.
For a fellow prismo aeropress cold brew recipe, you can adapt the concentrate method above, using the same 1:2 volume ratio and a long steep, then pressing through the Prismo. Since the transcripts here don’t cover the Prismo directly, test your timing and grind and adjust to your taste.
AeroPress Flow Control Cap Cold Brew
Pressing hard pushes harsh, bitter compounds into your cup along with the good ones.
Let the plunger sink gently, even over 60 to 90 seconds. Using an aeropress flow control cap cold brew setup helps you stay slow, because the cap restricts flow and removes the temptation to rush.
Side by side, a slow press gives a silky texture, while a forced press tastes rough.
The same applies to an aeropress flow control cap cold brew. Here, the standard AeroPress cap and paper-filter process rather than a flow-control-cap recipe.
Four AeroPress Principles: Shorter, Coarser, Lower, Slower
To make juicy cold brew, there are four broader AeroPress brewing principles: shorter, coarser, lower, slower. These ideas focus on controlling coffee-to-water ratio, grind size, temperature, and pressure.
Shorter
Use common dilution ratios and demonstrates concentrated brewing, including a very strong 1:4 recipe that requires later dilution.
Coarser
Experiment with coarser grounds rather than automatically choosing finer coffee for immersion brewing. The goal is a tasty cup rather than simply maximizing extraction.
Lower
Lower brewing temperatures are recommended here, with different ranges suggested according to roast level. Well, the AeroPress’s design may not necessarily require extremely high brewing temperatures.
Slower
Finally, pressing slowly can produce a smoother result. Do hard pressing with a gentle press lasting up to approximately 90 seconds.
Frequently Asked Questions
Can I make cold brew with an AeroPress?
Yes. You can do it both an overnight cold brew concentrate and a rapid AeroPress XL method using room-temperature water.
Can I use cold brew concentrate for hot coffee?
Yes. You can dilute the concentrate with an equal portion of hot water for a hot drink.
How strong should AeroPress cold brew be?
That depends on whether you want ready-to-drink coffee or concentrate. Applying overnight recipe is deliberately concentrated and is designed to be diluted before serving.
Should I use light or dark roast coffee?
You can use medium or dark roast for one concentrate recipe, while you can use a lighter side of medium roast with AeroPress XL. Experimenting with roast level is therefore part of dialing in the recipe.
How long does AeroPress cold brew concentrate last?
The prepared cold brew can be refrigerated for approximately 5–7 days.
Is AeroPress cold brew less acidic than hot coffee?
Yes. Cold water extracts fewer acidic compounds, so the cup is smoother and easier on the stomach.
Do I need a scale to make juice cold brew coffee with Aeropress?
No. You can measure by volume with a measuring cup, such as one cup of coffee to two cups of water.
Key Takeaways
-
-
- AeroPress can produce small-batch cold brew concentrate without a dedicated cold brew maker.
- The overnight method uses approximately 35–40 g coffee and 150 ml water.
- AeroPress cold brew can steep for at least 12 hours and up to approximately 24 hours with the recipe here.
- Grind size can dramatically affect the finished coffee, so experiment rather than relying on one fixed setting.
- Freshly grinding the beans is recommended for better flavor.
- Cold brew concentrate can be diluted with water, milk, or hot water.
- The AeroPress is particularly useful when you only need a small amount of cold brew.
- Cold brew is smoother and less acidic than hot-brewed coffee.
- The XL method uses 60 g of coffee, 300 g of water, 90 seconds of stirring, and a 30-second press.
- Overnight concentrate steeps 12 to 24 hours and keeps 5 to 7 days refrigerated.
- Use a medium grind for the fast method and between espresso and drip for the concentrate.
- Press slowly for a silky texture, and use fresh, freshly ground beans.
- Use your cold brew concentrate to craft either refreshing iced beverages or rich, steaming hot cups.
- Choose between a traditional overnight steep or a rapid 3-minute method using the AeroPress XL.
- Adjust variables like grind size, water temperature, and gentle pressure to eliminate bitterness and maximize a silky-smooth mouthfeel.
-
Conclusion
The AeroPress is one of the most flexible cold brew tools you can own. It’s quick when you’re in a hurry, easy to scale for one person, and simple to clean. Master the grind, ratio, and gentle press, and you’ll get a smooth, sweet, juicy cup of coffee cold brew every time.
Making aeropress juicy cold brew coffee does not require a large brewing system or complicated equipment. The AeroPress gives you a compact way to experiment with concentrated cold brew, whether you prefer an overnight extraction or the faster AeroPress XL approach.
The most useful lesson from the transcript is to treat brewing as an adjustable process. Change the coffee-to-water ratio, grind size, roast level, steeping time, and pressure until the result matches your taste. Start with the demonstrated recipes, then make small adjustments rather than changing everything at once.
For a simple starting point, try the overnight concentrate with medium-roast coffee, freshly ground between espresso and drip, then dilute the finished concentrate over ice. If you want a faster experiment, the AeroPress XL method provides a room-temperature recipe that relies on vigorous stirring instead of an overnight steep.
