
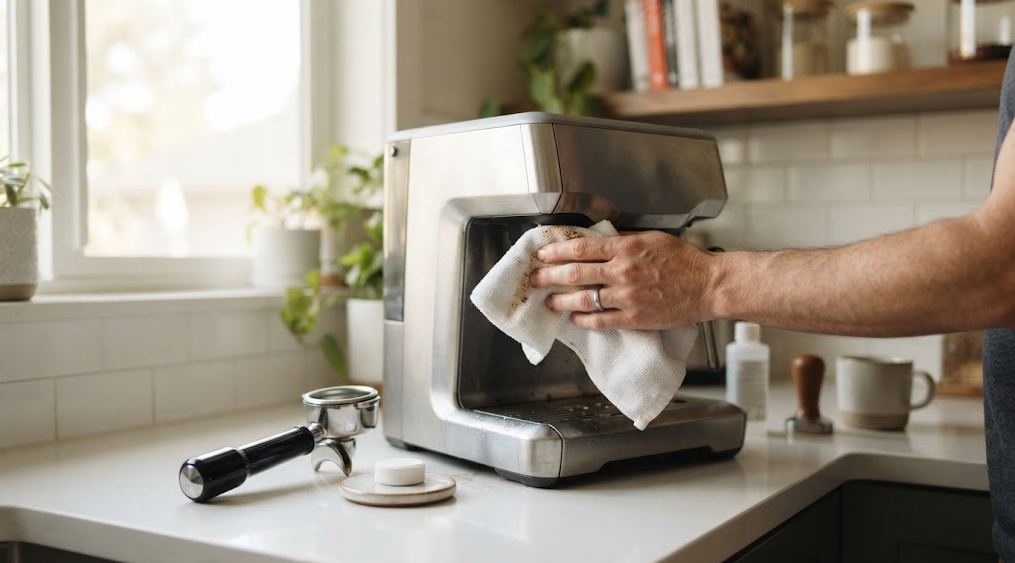
Cleaning Breville Coffee Machine: Step-by-Step Guide
If your Breville is producing weak, bitter, inconsistent, or strange-tasting espresso, the problem may not be your beans or grind settings. A dirty group head, clogged shower screen, old coffee oils, and stale grounds inside the grinder can all affect the quality of your shots.
And, if the water coming out of your coffee machine looks cloudy or brown, it can explain why your shots taste bitter or flat. Cleaning a Breville coffee machine properly takes about 30 minutes once a month, and it is the single easiest way to get better espresso and extend the life of your machine.
That is why regular cleaning Breville coffee machine maintenance should be part of your normal coffee routine. The good news is that a proper deep clean does not have to be complicated. With a cleaning tablet, the supplied rubber disc, a soft brush, and some clean water, you can remove a surprising amount of coffee residue in a relatively short time.
This guide combines the practical cleaning process with additional troubleshooting advice so you can clean the group head, backflush the machine, maintain the grinder, rinse away cleaning residue, and deal with common cleaning-cycle problems like what to do when the warning lights misbehave.
Why Cleaning Your Breville Coffee Machine Matters
Every espresso shot leaves behind coffee oils and microscopic particles. Over time, those oils build up around the shower screen, group head, portafilter, and internal brewing pathway. Old residue can eventually become stale or rancid, which may affect the flavor of fresh coffee.
The grinder can create another problem. Stale grounds can remain around the burrs and inside the grinding chamber. Those old particles can mix with freshly ground beans, meaning the coffee in your next shot is not entirely fresh.
Regular cleaning can help:
- Improve espresso flavor and aroma.
- Reduce accumulated coffee oils and residue.
- Keep the shower screen and group head cleaner.
- Remove stale grounds from the grinder.
- Maintain consistent water flow.
- Keep the machine operating properly for longer.
For many home users, a deeper cleaning approximately once a month is a practical starting point, although frequent users may need to clean certain components more often.
What Happens When You Skip Cleaning
- Bitter, sour or flat-tasting shots
- Slower water flow and uneven extraction
- Stale grounds from the grinder mixing into fresh beans
- Shorter machine lifespan and more frequent repairs
What You Need Before Cleaning
Before starting, gather everything you need.
Using the correct equipment makes the process easier and reduces the chance of leaving cleaning residue behind.
- Breville-compatible cleaning tablets.
- The single-shot basket.
- The rubber cleaning disc or silicone cleaning insert supplied with the machine.
- A soft damp cloth.
- A soft brush for the grinder and external components.
- A container for flushing water.
- Clean water.
- Mild dish soap for removable components such as the drip tray.
The supplied breville espresso machine cleaning tablets are designed for the machine’s cleaning cycle. If you need replacements, make sure the product is specifically intended for espresso-machine cleaning rather than using an unrelated household cleaner.
How to Clean the Breville Shower Screen and Group Head
The shower screen is one of the first places worth inspecting during a deep clean. Coffee residue can accumulate on the screen because it sits directly above the coffee puck during brewing.
Remove the screw on the group head and pop off the shower screen. The gunk you see is what has been touching your coffee every morning.
1. Remove the Shower Screen
Switch the machine off and allow it to cool if it has recently been operating. Following your model’s instructions, remove the retaining screw and carefully take off the shower screen.
Look closely at the screen. If you see dark coffee residue, oily buildup, or blocked holes, that material has been sitting directly in the brewing area.
2. Soak and Scrub the Components
Dissolve an appropriate cleaning tablet in warm water according to the cleaner’s instructions, then soak the removable screen and screw. While they are soaking, wipe the group head with a damp cloth.
Do not stop after soaking. Gently scrub the components, rinse them thoroughly with clean water, and make sure there is no cleaning residue remaining before reinstalling them.
How to Soak and Scrub
- Dissolve one cleaning tablet in a cup of warm water.
- Drop the shower screen and screw into the solution to soak.
- While they soak, wipe the group head with a damp towel.
- Scrub and rinse the soaked parts. This is the step most people skip.
- Reattach the screen and screw firmly.
Why This Step Is Easy to Miss
Running an automatic cleaning cycle does not necessarily mean every removable component is spotless. Manual cleaning of the shower screen and group head removes residue that can otherwise remain attached to the surfaces.
How to Clean Breville Barista Express With Tablets
If you are wondering how to clean breville barista express with tablets, the process centers around the machine’s automatic cleaning cycle and the supplied cleaning disc.
Prepare the Machine
Start with the machine switched off. Fill the water tank appropriately and empty the drip tray. Place the single-shot basket into the portafilter and install the rubber cleaning disc or silicone insert supplied for the cleaning cycle.
Place one cleaning tablet into the appropriate cleaning insert, then lock the portafilter securely into the group head.
Start the Cleaning Cycle
On compatible Barista Express models, the automatic cleaning cycle is initiated by pressing the appropriate single-shot, double-shot, and power controls simultaneously while the machine is switched off. press and hold the single shot, double shot and power buttons together for about five seconds until the cycle begins.
During the cycle, the machine builds pressure, holds it for roughly ten seconds, then releases it and flushes the dirty water into the drip tray. This action forces cleaning solution and water through the brewing system and pushes contaminated liquid into the drip tray.
Do not interrupt the cycle unless your machine’s instructions specifically tell you to do so.
Models differ slightly, so confirm the button combination in your manual. Some models use the one-cup and two-cup buttons with power.
Check the Tablet
Once the cycle has finished, remove the portafilter and inspect the cleaning tablet. If it has not completely dissolved, another cleaning cycle may be necessary.
Depending on the machine, tablet, water temperature, and condition of the machine, more than one cycle may be required. The important point is not to assume that one cycle automatically means the machine is completely clean.
Backflushing Your Breville Espresso Machine
The backflush forces water up and through the system, pushing out coffee oils and residue from the internals. It is also the answer to the most common search: how to clean breville barista express with tablets.
The Procedure
- Fill the water tank to the top.
- Empty the drip tray completely, because dirty water will be released into it.
- Insert the single shot basket in the portafilter and place the rubber disc on top.
- Add one cleaning tablet and lock the portafilter into the group head.
Backflushing is an important part of espresso-machine maintenance because it helps remove coffee oils and residue from areas that normal brewing does not fully clean.
With the rubber disc installed, the machine cannot simply push water through the basket as it would during normal espresso preparation. Instead, pressure builds and is subsequently released, sending water back through parts of the brewing pathway.
This process helps loosen accumulated coffee oils and residue.
Rinse After Backflushing
After the cleaning cycle, run additional water-only cycles as appropriate for your model. The goal is to remove remaining cleaning solution from the brewing system.
Continue rinsing until the discharged water is clear and you are confident that the cleaning product has been flushed away.
Flush the Machine After Cleaning
One of the most important steps here is also one of the easiest to overlook: rinsing the machine after using cleaning tablets.
This is, in my opinion, the most important step after the cycle. Residue from the tablet should never end up in your cup.
Flushing Method
- Place an empty container under the group head and run the double shot button to clean water through the group head
- Turn on and flush the steam wand then the hot water dispenser.
- Continue using fresh water until you have thoroughly rinsed the machine. A partial or full tank of fresh water may be appropriate depending on the model and its instructions. Repeat until about half a tank of water has gone through. Half a tank is enough to rinse remaining cleaner out of the system.
- Keep rinsing until the water runs completely clear.
The purpose is simple: you do not want leftover cleaning solution remaining in the machine when you make your next espresso.
How to Deep Clean the Breville Grinder on Barista Series Machines
Stale coffee stuck in the grinder gets into every dose, so your fresh beans never get a fair chance. Cleaning it is quick.
- Remove the hopper from the top of the machine and vacuum out any beans. Vacuum loose beans and grounds from the hopper area before accessing the burr assembly according to your model’s instructions.
- Twist the metal handle to remove the inner burr.
- Vacuum the grinder chamber again to remove stale grounds.
- Use a paintbrush to dust the chamber and the burr.
- Lock the burr back into place and reinstall the hopper.
Cleaning the brewing system is only half of a proper deep clean if your Breville has an integrated grinder.
Clean the Burr Area
Remove the inner burr only if your model is designed for user removal and you are comfortable reinstalling it correctly. Vacuum out stale coffee particles, then use a soft brush to remove remaining grounds from the grinding chamber and burr area.
Avoid introducing water into the grinder unless the manufacturer’s instructions specifically permit it. Moisture around burrs and electrical components can create unnecessary problems.
Once the grinder is clean, reinstall the burr and hopper securely.
Why Grinder Cleaning Improves Coffee
Stale grounds can remain trapped inside the grinder and mix with fresh coffee. Removing that buildup helps ensure your freshly loaded beans are actually producing fresh grounds.
Cleaning the Drip Tray and Water Tank
After completing the cleaning cycle while the machine is apart, remove the water tank and drip tray with soap and water. Wash removable components with warm water and mild dish soap where permitted by the manufacturer.
For milk residue on the steam wand, a dedicated breville steam wand cleaning solution dissolves baked-on protein that a wipe cannot reach. Always purge the wand briefly after each use.
Pay particular attention to the corners of the drip tray, where old coffee residue and stagnant water can accumulate.
Rinse everything thoroughly and allow components to dry before reassembling the machine.
Other Breville Cleaning Products
Different Breville models can use different cleaning procedures and accessories. For example, owners may search for breville duo temp pro cleaning tablets or breville infuser cleaning tablets when looking for compatible cleaning products.
Similarly, a breville barista pro descaling solution is intended for descaling rather than simply removing coffee oils. These are two different maintenance tasks and should not be confused.
For the Precision Brewer line, users may search for breville precision brewer cleaning solution, while owners of machines with milk systems may specifically look for an appropriate breville steam wand cleaning solution.
Cleaning Tablets vs. Descaling Solution
Cleaning tablets primarily address coffee oils and residue in the brewing system
Descaling is intended to remove mineral deposits caused by hard water.
They are separate jobs and need separate products.
Tablets will not dissolve limescale
And, descalers do not remove coffee oils.
When shopping for the best descaler for breville espresso machine, choose a product that is explicitly compatible with your machine and follow the manufacturer’s recommended dilution and procedure.
Check the label and avoid vinegar, which can leave residue and affect seals. Always follow the instructions in your manual.
The same principle applies when searching for the best descaling solution for breville bambino plus. Do not assume that a product suitable for one Breville model is automatically the ideal choice for another.
Model-Specific Notes
- Barista Pro: A breville barista pro descaling solution that matches the manufacturer’s guidance is the safest option.
- Bambino Plus: Many owners look for the best descaling solution for breville bambino plus models, since small thermojet systems are sensitive to scale.
- Duo-Temp Pro: Stock breville duo temp pro cleaning tablets for the monthly backflush.
- Precision Brewer: Drip brewers need a breville precision brewer cleaning solution rather than backflush tablets.
- The Infuser: Use breville infuser cleaning tablets for its cleaning cycle.
Breville Cleaning Light Troubleshooting
Breville Espresso Machine Descale Light Keeps Flashing
When the breville espresso machine descale light keeps flashing, the machine is asking for a descale, not a clean. Run the descaling procedure in your manual with a suitable descaler, then rinse thoroughly. A flashing light after a completed descale may mean the procedure was interrupted.
On the other side, the machine may be indicating that a descaling procedure is required or that the maintenance process has not been properly completed. Check the instructions for your exact model before attempting to reset the indicator.
Breville Barista Express Clean Me Light Won’t Turn Off
The Clean Me light appears after a set number of shots and stays on until a full cycle finishes. If your breville barista express clean me light wont turn off, the cycle likely did not complete. Make sure the tank is full, the drip tray is empty, the disc and tablet are in place, and the portafilter is locked in. Run the cycle again to the end. Owners asking how to clear clean me light breville baristas express machines usually solve it by letting the full cycle finish without interruption.
If the breville barista express clean me light wont turn off, first confirm that the complete cleaning cycle was performed correctly. Check the cleaning disc, tablet placement, water level, and cycle initiation procedure.
How to Clear Clean Me Light Breville Baristas Express
When researching how to clear clean me light breville baristas express, remember that simply switching the machine off may not reset the maintenance indicator. The machine generally needs its programmed cleaning process completed correctly before the indicator clears.
If your breville barista express cleaning cycle not working problem persists, confirm the machine is fully off before pressing the buttons, and hold them for the full five seconds. Check that the portafilter is locked firmly and the water tank is seated. If it still fails, contact Breville support.
Breville Barista Express Cleaning Cycle Not Working
If the breville barista express cleaning cycle not working after several attempts, verify that the water tank is properly seated and filled, the drip tray is correctly positioned, the correct basket and cleaning disc are installed, and the machine is being started using the procedure specified for your model.
Moreover, confirm the machine is fully off before pressing the buttons, and hold them for the full five seconds. Check that the portafilter is locked firmly and the water tank is seated. If it still fails, contact Breville support.
What If Your Breville Has Slow Flow After Cleaning?
A breville coffee machine slow flow after cleaning can have several causes. The shower screen may still be partially blocked, the filter basket may contain residue, the grinder may be producing excessively fine grounds, or the machine may require descaling because of mineral buildup.
Start by checking the simple possibilities. Run water without coffee, inspect the shower screen, clean the basket, and make sure the machine has been thoroughly rinsed after using cleaning tablets.
Sometimes, it is usually caused by trapped air, a shower screen reassembled incorrectly, or leftover scale. Run a few water-only flushes, check that the screen sits flat, and descale if you live in a hard-water area.
How Often Should You Clean a Breville?
A practical maintenance routine is more effective than waiting until the machine looks dirty.
- After every use: Wipe the steam wand and purge it according to the manufacturer’s instructions.
- Regularly: Rinse the portafilter and basket and wipe the group head.
- Monthly: Perform a deeper cleaning and backflush when appropriate for your model.
- As required: Clean the grinder and removable components.
- When indicated: Descale according to your machine’s maintenance instructions and water conditions.
FAQs About Cleaning a Breville Coffee Machine
Can I use cleaning tablets in a Breville espresso machine?
Yes, compatible espresso-machine cleaning tablets are commonly used for the machine’s cleaning or backflush cycle. Always follow the instructions for your specific Breville model and the tablet manufacturer.
How often should I backflush my Breville?
For many home users, a deeper cleaning approximately once a month is a reasonable starting point, but heavy users may need more frequent maintenance.
Are cleaning tablets the same as descaler?
No. Cleaning tablets target coffee oils and residue, while descaling products target mineral deposits. They perform different maintenance functions.
Why does my Breville still taste bad after cleaning?
Check bean freshness, grinder cleanliness, grind size, water quality, shower screen, filter basket, and extraction settings. Cleaning removes buildup, but it cannot compensate for stale beans or incorrect brewing parameters. Stale grounds in the grinder are a common culprit.
Should I rinse the machine after using a cleaning tablet?
Yes. Thoroughly rinsing the brewing pathway with fresh water after a cleaning cycle is an important part of the process and helps remove remaining cleaning solution.
How many cleaning cycles do I need?
Usually two or three, until the tablet has fully dissolved. Then rinse until the water runs clear.
Is vinegar safe for descaling?
It is not recommended. Use a descaler designed for espresso machines.
Key Takeaways
- Clean the shower screen and group head, not just the portafilter.
- Use the correct cleaning tablet and rubber cleaning disc for the machine.
- Run the programmed cleaning cycle according to your model’s instructions.
- Repeat the cycle if the tablet has not fully dissolved when the instructions permit.
- Flush the machine thoroughly with fresh water afterward.
- Deep-clean the grinder to remove stale grounds and coffee buildup.
- Wash the drip tray and water tank regularly.
- Remember that descaling and cleaning tablets solve different problems.
- Clean your Breville about once a month.
- Soak the shower screen, backflush with a tablet and repeat until it dissolves.
- Always flush about half a tank of water afterward to remove chemicals.
- Clean the grinder, water tank and drip tray at the same time.
- Cleaning and descaling are different jobs with different products.
- Most warning-light problems are fixed by completing a full cycle.
Conclusion
A clean Breville is simply more enjoyable to use. Coffee oils, stale grounds, and residue accumulate gradually, so it is easy to overlook them until espresso starts tasting noticeably worse or water flow becomes inconsistent.
The most effective approach is straightforward: clean the removable brewing components, wipe the group head, use the proper cleaning tablet and backflush procedure, rinse the machine thoroughly, and periodically deep-clean the grinder and drip tray.
Once you make this part of your monthly routine, cleaning becomes much less of a chore. More importantly, your Breville stays in a better condition and gives you a cleaner, more consistent foundation for making great espresso.
Cleaning a Breville coffee machine is not complicated, but it is easy to forget. A monthly routine of shower screen soak, backflush, grinder clean and thorough rinse keeps your shots tasting fresh and protects your investment. Next time you look at your machine, ask yourself when you last cleaned it. If you cannot remember, do it today.
