
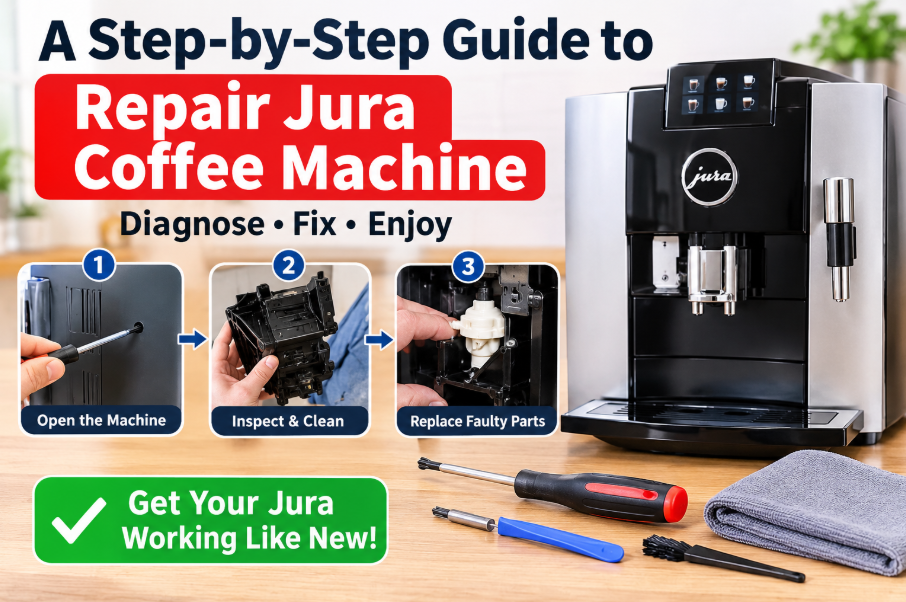
How to Fix Jura Coffee Machine Issues: Leaking Water, Won`t Brew Error, Milk Frother Issue, etc
Jura automatic coffee machines are designed to deliver consistent espresso, cappuccino, and other coffee drinks with minimal effort.
However, like any coffee machine, they can develop problems over time. You might notice water collecting in the drip tray, coffee grounds remaining dry, weak coffee flow, or a milk frother that suddenly stops working.
The good news is that some Jura coffee machine problems can be resolved with careful cleaning and basic maintenance. Others, particularly those involving the drainage valve, brew group, seals, or internal water system, may require replacement parts and specialist tools.
In this guide, we’ll explain how to repair Jura coffee machine problems using practical examples from Jura Z6, E8, ENA 4, Impressa C65, C7, Impressa A9, and other models.
Here, you’ll also learn how to identify common symptoms, perform basic maintenance, and recognize what actually goes wrong inside these super-automatic machines and how to fix it safely.
1. Understand Common Jura Coffee Machine Error
Most Jura faults come from three areas: the drain valve, the brew unit and the milk system. Worn seals, dried coffee oils and hardened milk residue cause the majority of breakdowns. Understanding this saves time, because you can often fix the problem without tearing the whole machine down.
Before disassembling your machine, identify exactly what is happening. Several different faults can produce similar symptoms, so observing the machine’s behavior is an important first step.
- Water in the drip tray: A worn or faulty drainage valve may direct water away from the brewing system.
- Dry coffee grounds: Water may be bypassing the brew group instead of passing through the coffee.
- Slow coffee flow: A clogged passage, dirty brew unit, drainage valve problem, or weak pump pressure may be responsible.
- Milk not frothing: Dried milk residue can block small components inside the milk frother.
- Brew group errors: Internal buildup, mechanical resistance, or a component that cannot reach its correct position may prevent normal operation.
- Grinding without brewing: A mechanical or hydraulic fault may prevent the machine from turning ground beans into coffee.
Always switch off and unplug the machine before removing panels or accessing internal components. Allow hot parts to cool, remove the water tank and drip tray, and follow the service instructions for your exact model. Internal repairs involve electrical components, hot water, and pressure, so do not work on an energized machine.
2. How to Open a Jura Coffee Machine Safely
Knowing how to open jura coffee machine housings is useful when cleaning or inspecting internal components. However, the procedure varies between models. The following example comes from a Jura Z6 PEP super-automatic coffee machine and should not be assumed to apply to every Jura model.
Tools You May Need
- A compatible proprietary Jura oval-bolt remover
- A Torx T10 screwdriver or driver
- A small wooden skewer for the rear panel
- A small piece of wood for gently releasing retaining clips
- A suitable work surface and container for screws
Step-by-Step Opening Procedure for the Jura Z6 PEP
- Remove external components. Switch off and unplug the machine. Remove the water tank, coffee tray, and other removable components needed for access.
- Release the rear plate. You can use a wooden skewer to lift and pull the rear plate free. Work gently to avoid damaging the plastic.
- Remove the proprietary bolts. The Z6 example has four oval fasteners at the back. Use a compatible Jura bolt remover to remove them individually.
- Remove the rear plastic piece. Once the fasteners are removed, lift the plastic section.
- Remove the Torx screws. Use a T10 driver to remove the two identified Torx screws.
- Release the side panel. Rather than pulling the panel forcefully, use a small piece of wood to apply gentle pressure near the retaining clips. Once the clips release, the side panel can come away more easily.
Keep track of the fasteners and panel positions as you work. Do not force a panel that remains firmly attached. If your machine differs from the Z6 PEP, consult the correct service documentation before proceeding.
Newer Jura models use ordinary steel rather than stainless steel for many Torx screws. They can rust and seize after a few years, so check them early and add a little maintenance rather than waiting until they must be drilled out.
3. How to Fix Jura Leaking Into the Tray
One of the most useful troubleshooting involves a Jura machine that grinds coffee but produces no drink. The grounds remain dry while water collects in the drip tray. A faulty drainage valve is identified as a likely cause.
Inspect the Drainage Valve
The drainage valve helps control the movement of water and the release of pressure from the brewing system. When its seals wear out or a component becomes loose, water may travel into the tray instead of through the intended coffee-brewing path.
Related to this, the white cap on the drainage valve had loosened over time. This prevented the spring from retracting the shaft correctly, allowing pumped water to flow directly into the tray.
The video describes removing the cap, applying a small amount of glue, and reinstalling it while ensuring the shaft is fully retracted into the cap. This is a model-specific repair example, not a universal recommendation. Adhesives may be unsuitable for hot, pressurized, food-contact components, so verify the manufacturer’s approved repair method before attempting it.
When the Drain Valve Needs Replacement
If the cap, spring, shaft, or seals are damaged, a more thorough repair may be necessary. A technician may need to disassemble the relevant assembly, inspect the seals, replace worn parts, and test the machine for leaks.
This approach is particularly relevant when investigating how to fix jura leaking brew unit problems. Coffee or hot water leaking from the brew group may indicate damaged gaskets, worn seals, or an incorrectly assembled component. Inspecting the entire brew unit can help identify the source instead of replacing parts without confirming the fault.
On a Jura C7 brew unit that leaked coffee and water, be sure to disassemble the whole unit and replace all the gaskets, then check down to the mushroom valve at the bottom. A leaking brew unit nearly always means damaged or hardened gaskets, sometimes caused by shipping damage on replacement units.
Wondering how to fix Jura leaking into tray?
Check the drain valve first. Its seals wear out over time, and the white cap can loosen so the spring no longer pulls the shaft back. The pump then sends water straight into the tray instead of through the coffee.
Quick Fix Without Full Disassembly
- Pop off the white cap of the drain valve with a flathead screwdriver. It is tricky but possible.
- Put a couple of drops of glue inside the cap.
- Refit it, making sure the shaft is pulled fully back into the cap.
If the seals are worn, the proper repair is to replace them, which requires removing the brew unit.
4. How to Repair and Clean the Jura Impressa C65
In Jura Impressa C65 machine, it had accumulated coffee residue inside the brew unit, while another would grind beans but fail to brew because of a faulty drainage valve.
Cleaning the Brew Unit
- Disconnect the machine from the power supply before accessing internal components.
- Inspect accessible areas for loose coffee grounds, residue, and signs of leakage.
- Check the relevant service procedure before removing the brew unit or internal housing.
- Clean removable components with products approved for the machine and the component material.
- Rinse cleaned parts thoroughly where the cleaning product requires rinsing, then allow them to dry as directed.
- Inspect seals and gaskets for damage and replace defective parts with compatible components.
For anyone researching how to repair and clean jura impressa C65 machines, remember that cleaning cannot correct every mechanical fault. In the C65 repair, it involved replacing the drainage valve before testing whether the machine could brew normally again.
To fix Jura C65 coffee not brewing, it usually describes a machine that grinds but produces no coffee. In one case the cause was a faulty drain valve, which looks similar to a solenoid valve but is slightly more square and larger. Replacing it brought the machine back to normal. Similar symptoms affect the Jura coffee machine not grinding complaint, so also check the grinder and the grounds chute before assuming the valve is at fault.
In order to repair and clean Jura Impressa C65, start with the pressure-release solenoid, which discharges pressure from the brew group. Then clean away old coffee build-up and any mold visible through the brew unit. Heavy residue is common on machines that have not been serviced, and regular cleaning prevents sticking and sluggish operation.
5. How to Fix Jura ENA 4 Slow Coffee and Water in the Tray
A Jura ENA 4 had two symptoms: coffee flowed very slowly, and water drained into the drip tray. The repair focused on the brew unit and drainage valve.
To fix Jura Ena 4 slow coffee & water in the tray, the repair follows this order:
- Remove and wash the brew unit.
- Take the drain valve apart by undoing two small screws and removing the protective cover.
- Wash the valve, replace the seals and reassemble.
- Grease the brew unit so it moves smoothly.
- Refit it, secure the two screws into the gearbox metal and the self-tapping screw into the plastic housing, then test.
On the bench, this restored strong, hot, aromatic coffee, confirming the drain valve was the fault.
If the Ena 4 test shows slow coffee even after the drain valve is serviced, the problem is in the water system: a blockage somewhere or low pump pressure
Cleaning and Servicing the Drain Valve
The process involved dismantling the drain valve, removing its protective cover, cleaning the parts, replacing the seals, and reassembling the mechanism. The brew unit was also cleaned and lubricated with suitable grease.
The repairer then reinstalled the brew unit, secured it with the appropriate screws, and tested the machine. The drainage valve was identified as the cause of the weak coffee flow in this particular case.
Again, if you are investigating how to fix jura ena 4 slow coffee & water in the tray, begin by checking routine maintenance needs and looking for visible blockages. If the problem persists, a drainage valve or water-system fault may need professional diagnosis.
What If Coffee Still Flows Slowly?
If the drainage valve and coffee spout are clean but coffee still flows slowly, be sure to check the water system for a blockage or insufficient pump pressure. These faults require further testing rather than assuming the drainage valve is responsible every time.
6. How to Fix Jura E8 Milk Not Frothing
A Jura E8 that previously made good cappuccinos may stop frothing when dried milk accumulates inside the frother. A particularly useful discovery: cleaning the visible parts was not enough because sticky, dried milk remained inside a removable knob.
Clean the Milk Frother Thoroughly
- Remove the milk frother components according to the model’s instructions.
- Take off the small removable top piece and rinse away milk residue.
- Remove the plastic component at the end of the assembly, where applicable.
- Check whether the knob or other removable parts can be taken out for cleaning.
- Inspect hidden openings and internal surfaces for dried, gummy milk deposits.
- Clean all approved removable parts, rinse them thoroughly, and dry them as directed.
- Reassemble the frother correctly and run a suitable test.
Here, you can remove and clean the knob revealed the dried milk responsible for the error. Once the frother was reassembled, the machine produced a cappuccino successfully.
This is a practical first step when learning how to fix jura E8 milk not frothing. If cleaning does not restore performance, inspect the milk intake, air passages, and other components according to the manufacturer’s maintenance guidance.
7. Jura Brew Group and Error Code Meaning
At this point, a Jura Impressa A9 with an Error 8 fault will be solved here. The brewing unit was unable to reach its correct home or working position, and substantial coffee residue and mold-like buildup were found inside the machine.
What to Check Before Replacing Parts
- Look for excessive coffee buildup around accessible components.
- Check whether routine cleaning and descaling are overdue.
- Have the brew group inspected for damaged seals, worn parts, or mechanical obstruction.
- Confirm that the relevant components move and fit correctly during professional reassembly.
- Test the machine after servicing to verify that the original fault has been resolved.
Be sure to clean the machine thoroughly, replace relevant gaskets, and service the brew unit. The footage also shows that an Error 8 message appeared again during testing, so the example should not be treated as proof that cleaning alone permanently resolves every Error 8 fault.
How to Fix Jura E8 Brew Group
The newer E8 uses a V3 3D brewing unit, the same family used in the S8, Z8, Z6 second generation and Z10. Here is how to fix Jura E8 brew group issues step by step:
- Clean all parts in an ultrasonic cleaner, or soak them in a coffee machine cleaning powder and rinse thoroughly.
- Check the shower head holes are clear by holding it to the light.
- Clear the tiny holes in the lower piston used for the pulse extraction program.
- Replace the drain valve and piston rubbers, then lightly apply food-grade silicone grease.
- Reassemble carefully, making sure the lower piston stays between the gears.
Upgrading the Drain Valve
Original press-fit alloy caps can come off and leave grounds dry while water dumps into the tray. An aftermarket replacement cap that cannot detach prevents the problem from returning.
Error 8 on Jura Machines
Error 8 means the brew unit is not reaching its home or working position because something is blocking it.
Jura Error 8 Brew Group Repair
A proper Jura error 8 brew group repair involves removing the unit, cleaning all residue, regreasing moving parts with food-grade silicone grease and checking the pistons move freely.
How to Fix Jura Impressa A9 Error Code
Here is how to fix Jura Impressa A9 error code 8. On a machine that arrived with this fault, the brew unit was full of coffee and mold. The technician removed the unit completely, cleaned deeply, replaced gaskets, descaled the machine and tested espresso, hot water and steam. Afterwards the error was gone.
Jura Impressa X9 Drain Valve Repair
The principle behind Jura Impressa X9 drain valve repair is the same as for other models: inspect the valve seals, clean the valve and replace worn rubber parts. Always confirm the exact parts for your model before ordering.
8. Other Common Jura Coffee Machine Issues
a. Grinding and Brewing Problems
If you are troubleshooting a jura coffee machine not grinding, first check whether the bean hopper contains beans and whether the machine displays a warning. Grinding faults can have different causes from brewing faults, so avoid assuming that a drainage valve is responsible without inspection.
If your Jura coffee machine no water coming out from the spout, work through the water system in order: tank seated correctly, filter not blocked, spout clean, then the pump. Weak pump pressure or a clog in the water path is the usual culprit once the drain valve is ruled out.
A jura coffee machine won’t brew may have several possible causes, including a brew group problem, a drainage valve fault, or a blocked water path. If the grinder operates and the grounds remain dry, the drainage valve is one possibility supported by the repair examples in this guide.
b. Water Pump and Water-Level Warnings
Jura coffee machine water pump repair requires care because the pump is part of the internal hydraulic system. If the machine makes unusual pump noises, delivers little water, or repeatedly fails to prime, professional diagnosis may be necessary.
A jura coffee machine fill water error may result from an incorrectly seated tank or a water-level detection issue. Confirm that the tank is filled and correctly installed before seeking service.
c. Power, Rinsing, and Error Code 2
If a jura coffee machine won’t turn on, check the power outlet and external power connections without opening the machine. If the outlet works but the machine remains unresponsive, unplug it and arrange service rather than investigating live electrical components.
A jura coffee machine stuck on rinsing may have a water-flow problem or another fault that prevents the cycle from completing. Follow the model’s official troubleshooting instructions and avoid repeatedly forcing the cycle.
For how to fix Jura coffee machine error code 2, start with the basics: make sure the water tank is filled and seated, then check for blockages. If the code returns, the water system or pump may need attention. Consult your model’s manual for the exact meaning on your machine.
d. Additional Model-Specific Searches
-
- How to fix jura c65 coffee not brewing: Check whether the machine grinds beans, whether the grounds are wet, and whether water is reaching the brew group. The C65 example points to a possible drainage valve fault.
- Jura Impressa X9 drain valve repair: Verify the correct X9 service procedure and compatible seals before dismantling the valve.
- Jura Micro 9 milk frother repair: Begin with the manufacturer’s approved cleaning procedure and inspect the frother for dried milk residue. And, disassemble every removable piece, flush out dried milk, dry everything completely and refit
- How to fix jura coffee machine error code 2: Use the exact model’s service documentation instead of applying an unrelated error-code repair.
- Jura coffee machine won’t turn on: Check the power cable, outlet and that the water tank is reconnected correctly after servicing.
- Jura coffee machine stuck on rinsing: Usually a sticking brew unit or a drain valve problem, so clean and lubricate.
- Jura coffee machine fill water error: Reseat the tank, clean the float and tank valve, then inspect the water path.
- Jura coffee machine won’t brew: Check the drain valve, pump pressure, and whether the brew unit is jammed.
These model-specific searches are useful starting points, but they should not replace an accurate diagnosis.
9. How to Test Your Jura Coffee Machine After Repair
After cleaning or servicing, the machine should be tested before its housing is fully reassembled. The repair needs the value of checking the rinse cycle, water flow, coffee extraction, and the condition of the used coffee grounds.
- Confirm that all serviced components and seals are correctly installed.
- Check that hoses, connectors, and fasteners are secure.
- Reinstall the water tank and removable components as directed by the manufacturer.
- Reconnect power only after the machine has been safely reassembled to the required service condition.
- Run the appropriate rinse or test cycle and watch for abnormal leakage.
- Prepare a test coffee and check whether the flow, temperature, and extraction appear normal.
- Stop immediately if water leaks internally, electrical issues occur, or the machine displays a persistent fault.
For internal repairs, testing with exposed electrical parts is best left to a qualified technician. Do not operate an open machine while touching internal components.
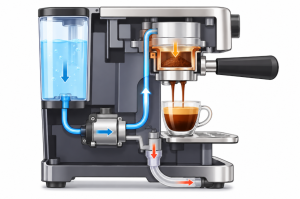
Experienced technicians recommend servicing the brew unit roughly every couple of years: clean, regrease and replace seals. Use food-grade silicone grease, tighten plastic housing screws gently and always unplug the machine first. If you are not comfortable working inside, or your machine is under warranty, use an authorized Jura service center.
Frequently Asked Questions
Why does my Jura coffee machine put water into the drip tray?
A drainage valve fault or worn seals may direct water into the tray. Other causes are possible, so inspect the machine’s maintenance condition and seek a proper diagnosis if the leak continues.
Why does my Jura grind coffee but not brew it?
If the grounds remain dry and water collects in the tray, a faulty drainage valve is one possible cause. A blocked water path or another brew group fault may also prevent extraction.
Can I clean a Jura brew group myself?
Routine cleaning can often be performed according to the manufacturer’s instructions. Internal disassembly, piston servicing, seal replacement, and drainage valve repairs require model-specific knowledge and appropriate tools.
Why is my Jura E8 milk frother not working?
Dried milk residue may block internal frother components, including parts that are not visible during routine cleaning. Thoroughly clean approved removable parts and arrange service if the problem persists.
When should I call a professional Jura repair technician?
Seek professional service for persistent error codes, internal leaks, pump failures, damaged wiring, brew group positioning problems, or repairs requiring extensive housing disassembly.
Can I repair a Jura coffee machine myself?
Yes, for many faults such as dirty brew units, worn drain valve seals and milk frother clogs. Electrical faults and warranty repairs are best left to professionals.
What tools do I need?
A Jura bolt remover, a number 10 Torx driver, a flathead screwdriver, a wooden skewer, food-grade silicone grease and replacement seals.
Why is water going into the tray instead of the coffee?
The drain valve is the most likely cause: worn seals or a loose white cap.
How often should I service the brew unit?
About every two years for typical home use, sooner with heavy use.
Is it worth repairing a Jura?
Often yes, because most faults need only seals, cleaning or one inexpensive part.
Conclusion: Keep Your Jura Coffee Machine Working Properly
Repairing a Jura coffee machine starts with identifying the symptom rather than immediately replacing parts. The repair examples discussed here show that drainage valve faults can cause water to collect in the tray, dry coffee grounds, and weak coffee flow. You can also learn how dried milk residue can prevent a Jura E8 frother from producing proper foam.
Regular cleaning, careful inspection, and correct reassembly can help maintain performance and prevent avoidable problems. However, internal hydraulic, electrical, and brew group repairs should be performed only when you have the appropriate tools, model-specific instructions, and technical experience.
Key Takeaways
-
- Check simple maintenance issues before considering internal repairs.
- Investigate the drainage valve when water enters the tray and coffee grounds remain dry.
- Clean hidden milk frother components as well as visible parts.
- Use the correct service documentation for your specific Jura model and error code.
- Test for leaks and proper coffee flow after servicing, and consult a qualified technician when necessary.
- The drain valve causes most “water in tray” and “no coffee” faults.
- Error 8 usually signals a dirty or jammed brew unit.
- Dried milk inside the frother knob can stop frothing.
- Use food-grade silicone grease and replace worn seals.
- Check for rusted Torx screws and use the right tools.
With the right troubleshooting approach, you can better understand your Jura coffee machine’s symptoms, choose the appropriate next step, and keep your daily coffee routine running smoothly.
You can successfully repair Jura coffee machine problems when you diagnose methodically: start with the drain valve, then the brew unit, then the water system. Careful cleaning, fresh seals and proper lubrication fix most issues.
